Hazy IPAs are probably the most popular beer style at the moment, and around Olympia, WA, the breweries are totally killing it! So, we decided to try brewing a hazy IPA but it didn’t turn out as “juicy” as we wanted.
This isn’t a bad hazy IPA recipe.
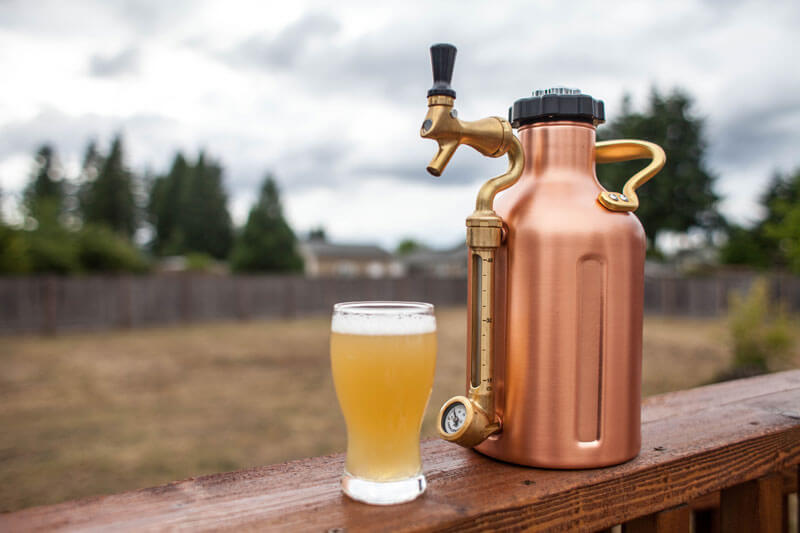
It smells totally delicious with a tropical burst from the Azacca hops, it looks hazy and it has very decent head retention.
But we wanted JUICE! Like, thick juicy looking hazy IPA. You know what I’m talking about.
This was also the first time we force carbed a beer using one of our uKegs 64oz. Which by the way, works great! BUT as we know, force carbonation doesn’t influence the flavor or aroma of a beer so we are not getting our hopes up when we open the first bottle a few days from now.
Ok, without further ado, let’s welcome the series of mistakes
Mistake #1: Wrong water volumes
As most of us know, it’s a struggle to find good detailed all-grain recipes online so we chose the one that looked decent. As soon as I started transferring the recipe to the Brew Journal I noticed that there were no water or strike temperatures information.
More research… fun…
Instead of using a reliable online calculator to figure out the exact amount of water I needed for this specific beer, I ended just using volumes I had recorded from past IPAs. Why??? I don’t know. I was anxious to get to the store ASAP. I don’t know. Anyway, never do that.
The big mistake here was the sparge water volume. I used 5.5 gal vs the 4.8 gal that I should have used (new volume calculated using a reliable online calculator).
More water volume = lower original gravity going into fermentation
Lower original gravity = lower ABV beer
I didn’t have any dry malt extract to fix that so oh well, I will just have a lower ABV beer. Let’s keep brewing.
THE FIX: use dry malt extract to bring the original gravity back up to your target OG.
Mistake #2: Didn’t take into consideration equipment efficiency
This is an important one!
I was supposed to mash the grains at 150F, so my water strike temperature needed to be 164F. All good. But as I was adding the water to my mash tun, I was loosing tons of heat and I ended mashing my grains at 132F!!! What happens then?
Low mash temp = thinner body
This temperature was SUPER low.
So far we have: too much water and super low mash temps.
Oh, just a side note. Before I brew again, I will retrofit the lid of my mash tun and add a connector of some sort with some type of DIY sparge arm in the inside. This way I can add water without opening the lid, therefore, preserving heat.
THE FIX: know your equipment efficiency when doing temperature calculations.
Mistake #3: Got distracted during whirlpool hop addition
This might be the reason why my brew lacked some flavor. Again, I was going for JUICE and given mistakes #1 and #2. This one was just the cherry on top of the cake.
To be very honest, I wasn’t super familiar with whirlpooling before this brew. I knew of, but didn’t know it was so scientific like you will read below.
First of all, I was supposed to add the hops as the wort cooled to 180F and I added the hops at 150F.
150F is considered “cold” for whirlpooling. At such low temps like this, you will volatilize the fewest hops oils. Also, longer “steeping” time is necessary. Whereas at 180F, you are able to volatilize a good amount of those oils while not adding much bitterness to the beer at all.
That said, if you can maintain somewhat stable temps while whirlpooling, that’s great.
I doubled down on my mistake here I guess, because I started whirlpooling at 150F and kept cooling the wort non-stop so who knows what the temperature was after 15 minutes.
THE FIX: don’t get distracted while brewing. Ever!
Mistake #4: Who cares about water profile?
I have never ever cared about water profile. Water is water, right? No.
During my research everyone talked about adjusting the water profile but when I (very briefly) tried to find the water profile that comes out of my kitchen faucet, everything got confusing and I said “screw it”.
It turns out that water profile affects mouthfeel, malt character and hops characteristics. AKA the entire beer!
Hazy IPA recipes call for high chloride levels vs the typical west coast IPA that favors higher sulfate levels. More specifically, most hazy IPAs target ratios of 1–3:1 of chloride to sulfate. My specific brew called for a 2:1 ratio of 155 ppm of chlorine to 78 ppm of sulfate. (full water profile in the recipe).
The higher chloride level brings out more of the malt character, which helps enhance the mouthfeel and contributes to the overall balance of the beer. MAYBE this is another reason why the mouthfeel was so thin AND it lacked a good malt backbone character. Just saying…
All in all, this is a beer I can take to barbecues and get togethers. It’s a very easy drinking SESSION hazy looking IPA.
The thing is, in life (and in brewing) we learn the most when we make mistakes and knowing everything that I know now I’m determined to turn this recipe into an award winning hazy IPA. Even if that takes a dozen batches to perfect and fine tune every characteristic of this beer.
If you guys have anything to add, please comment below. I’d love to hear what you have learned from your brewing mistakes too.